Installing underlay and tile battens
Underlay
This guide is designed for use where the underlay and tile battens are fixed directly to the rafters. For other situations please seek advice from the tile manufacturer and the manufacturer of the underlay.
As a minimum requirement, underlay should meet the wind uplift resistance classification in BS 5534.
Underlay is generally held in place by the tile battens, but where nailing is required, nails should be extra large head felt nails of 3.35 mm shank diameter and 20 mm long.
Lay the underlay, starting at, and parallel to, the eaves, maintaining a consistent tautness. Allow a nominal 10mm drape between rafters to allow any water entering the batten cavity to drain safely away to the gutter. Install underlay support trays at the eaves and lap the underlay 150mm over the underlay support trays.
Horizontal laps should be at least 150 mm wide. On roof pitches of 35 degrees and above this can be reduced to 100 mm. Vertical laps should be at least 100 mm wide and should coincide with a rafter. If necessary, increase the headlap to ensure the horizontal coincides with a tile batten. Alternatively, secure the lap with either tape or clout nails.
At a bedded verge, the underlay should finish over the outer skin of brickwork or outer rafter in the case of an overhanging verge. Where dry verge systems are used the underlay should overhang the verge as specified by the tile manufacturer.
At a duo-pitch ridge the underlay from one side should overlap the underlay on the other side by at least 150mm. This can be reduced to 100 mm for roof pitches of 35 degrees and above. Where a dry fix ventilated ridge system is used the underlay at each side should terminate below apex as specified by the manufacturer.
At a monopitch ridge the underlay should extend over the top fascia or masonry by a minimum of 100mm.
At a hip the underlay should overlap at the hip line by at least 150mm.
At a valley the underlay should overlap at the centre line by at least 300mm. Alternatively, a continuous strip of underlay, at least 600 mm wide, can be laid along the valley. In this case the main underlay should be cut to a mitre at the centre of the valley, overlapping the valley underlay by at least 300mm. Metal valley linings must not be laid directly onto underlay, therefore in this case the underlay must lap onto the valley lining – see valley details in Tiling Section.
At side and top abutments the underlay should be turned up the abutment by 50mm. Where a top abutment ventilator is used the underlay should terminate about 85 mm from the top of the rafter or as specified by the manufacturer.
At back abutments the underlay must overlap the material forming the back abutment by at least 150mm, or 100mm where the rafter pitch is 35 degrees or above. Care should be taken to avoid water traps.
Where a pipe or other component penetrates the underlay, neatly cut a cross and turn the underlay up to give a tight, water-shedding fit. An additional piece of underlay, or a proprietary underlay protector unit, should be fitted directly above the penetration to ensure that any water running down the underlay from higher up the roof is diverted away from the hole.
Battens
Batten Type
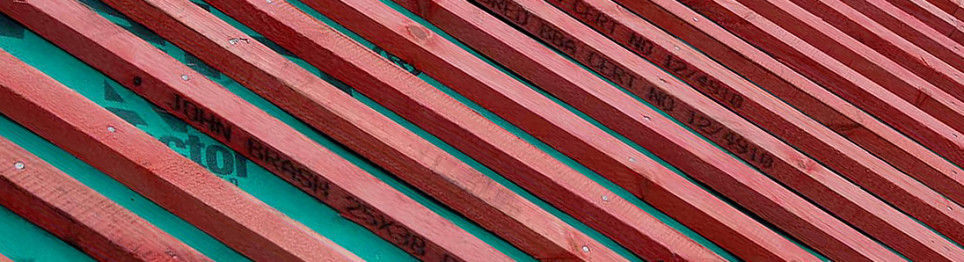
Timber species should be in accordance with BS 5534. Seek advice from the timber supplier. Battens for single lap tiles, when fixed on rafters spaced at centres up to 450mm, should be 38 x 25mm in section. For rafter spacings up to 600mm centres the battens should be 50 x 25mm in section.
Installation
Battens should be secured by nailing into each rafter using galvanised or sherardized smooth round nails. Annular ring shank or helical threaded shank nails may also be used. The minimum nail size is 65 x 3.35mm but the resistance of the fixing to wind uplift resistance should be determined using the information given in BS 5534.
Each batten should be not less than 1200mm long. For trussed rafter roofs where the batten gauge is more than 200mm there should be no more than one joint in any four consecutive battens on the same rafter. Where the batten gauge is less than 200mm there should be no more than three joints in any twelve consecutive battens on the same rafter. Where battens are jointed ensure the cut ends are square and the joint is located centrally over the rafter. Secure each batten end by splay nailing. Ensure that full support is provided to fix the ends of the battens at hips and valleys.
Set the first batten at eaves so that the first course of tiles overhangs the gutter by 45 to 55mm, or into the centre of the gutter, whichever is the lesser distance. Generally, battens should be parallel to the eaves and ridge lines. Where this is not possible, due to the shape or design of the building, fix the battens to be at right angles to the line of drainage.
The last batten should be set so that the ridge tiles overlap the top course of tiles by at least 75mm.
To determine the gauge for variable lap tiles divide the distance between the first and last batten by the maximum tile gauge. Round the answer up to the nearest whole number. Then divide the distance between the first and last batten by this figure to determine the actual gauge.
For fixed gauge tiles check the batch of tiles to determine the shunt possible between courses. If it is not possible to set the battens to obtain full courses between the limits of the available shunt then it will be necessary to have a short course of cut tiles at either the bottom or top edge.
Where two roof slopes of unequal pitch intersect at a hip or valley, set out the battens on both slopes to the lesser roof pitch.